7 Essential Tips for Setting Up Satellite Internet While Camping
Want reliable internet while camping in remote Australia? Satellite internet is your best option. Here’s what you need to know to stay connected, whether for emergencies, work, or entertainment.
Quick Takeaways:
- Why Satellite Internet? It works anywhere with a clear sky, offering speeds of 100-200 Mbps, perfect for remote areas where mobile networks fail.
- Best Option? Starlink Mini: A$599 hardware, A$80/month plans. Rent it for A$10/day via Offgrid Internet if you’re not ready to buy.
- Power Needs: Starlink Mini uses 20–40W. Use portable power stations or solar panels to keep it running.
- Setup Tips: Find a clear southern sky, avoid obstructions, and use the Starlink App to check alignment.
- Weather Protection: Invest in covers like the Dishy Shield to protect your gear from Australia’s harsh conditions.
Quick Comparison of Satellite Internet Options:
| System | Price (Hardware) | Monthly Cost | Speed | Latency | Best For |
|---|---|---|---|---|---|
| Starlink Mini | A$599 | A$80+ | 100–200 Mbps | 30–50 ms | Camping, remote work |
| NBN Skymesh | Varies | Varies | Slower (<50 Mbps) | 600–1500 ms | General home use |
With the right setup, satellite internet ensures you stay connected, safe, and entertained during your outback adventures.
1. Pick Your Satellite Equipment
Available Satellite Systems
Starlink is a popular choice in the market, especially with its compact Mini system.
The standard residential Starlink kit is priced at A$549, with a monthly fee of A$139. If you’re looking for something more suited to camping, the Starlink Mini costs A$599, with plans starting at A$80 per month.
Another option is NBN Skymesh, but it comes with some clear drawbacks. While its hardware is known for being sturdy, it offers much slower speeds and higher latency – ranging from 600ms to 1,500ms, compared to Starlink’s low latency of 30–50ms [3].
Before deciding, make sure the system you choose aligns with the specific needs of camping. Use the checklist below to guide your decision.
Equipment Selection Checklist
When selecting satellite equipment for camping, pay attention to these key features:
| Feature | Requirements | Why It Matters |
|---|---|---|
| Power Usage | 25–40W (Mini) / 50–75W (Standard) | Helps conserve battery life |
| Weather Rating | IP67 Type 4 or higher | Protects against harsh Australian conditions |
| Setup Time | Under 15 minutes | Saves time during camp setup |
| Connection Speed | 100–200 Mbps | Ensures reliable internet access |
| Weight | Under 10kg | Makes it easier to transport |
Using Starlink Mini While Camping

The Starlink Mini can connect up to 128 devices, providing download speeds of 150+ Mbps and upload speeds of 15+ Mbps. It also features a sleep mode that reduces power usage to just 20W when idle [2].
To get the most out of your Starlink Mini, consider adding these handy accessories:
- Flat Out International Multi-Reel for efficient cable organisation [4]
- Magnetic or flat mounts to keep the dish securely in place
- A weatherproof storage bag to protect your gear
These extras make your setup more reliable and easier to use, especially in the demanding conditions of the Australian outback.
2. Power Supply Setup
Power Usage Requirements
Knowing your power needs is key to keeping your satellite internet running smoothly while camping. Starlink models differ in their energy consumption:
| Starlink Model | Active Usage | Idle Usage | Daily Power Need (24h active) |
|---|---|---|---|
| Mini | 20–40W | 15W | 480–960Wh |
| Standard Actuated | 50–75W | 20W | 1,200–1,800Wh |
| High Performance | 110–150W | 45W | 2,640–3,600Wh |
Note: Power spikes up to 150W can occur during heavy rain or if obstructions are present [8]. Don’t forget to account for other devices you’ll need to charge – like a MacBook Air, which uses 30W to recharge [9].
Now, let’s look at reliable power sources for your outback adventures.
Power Sources for Remote Areas
When camping in remote locations, these power options are worth considering:
-
Portable Power Stations
The Jackery Explorer 100 Plus is a solid option. It comes with a LiFePO4 battery rated for 2,000 cycles, weighs just 965 grams, and supports solar charging. It’s available for A$149.00 [6]. -
Solar Panel Solutions
Renogy offers solar panels designed for Australian conditions. Options include:- A 100W monocrystalline panel (compact and lightweight) starting at A$139.99.
- A 200W panel from A$189.99.
- The ShadowFlux Anti-shading N-Type 200W model for around A$227.99 [5].
-
Vehicle Power Options
Use a 12/24V cigarette lighter power cable to charge your setup while driving.
Extend Battery Life
To make your power supply last longer:
- Rewire: Switch to a 12V power supply to avoid energy loss from inverters [9].
- Power Management: Use the Mini’s 15W sleep mode to conserve energy [7].
- Weather Monitoring: Clear skies help reduce power consumption and boost performance [8].
- Solar Charging: A SolarSaga 100W panel can fully recharge a Jackery Explorer 100 Plus in just 2 hours of sunlight [6].
If you’re planning a long off-grid trip, keeping an eye on your solar input and battery levels is crucial to ensure uninterrupted connectivity during your adventure.
3. Find the Best Setup Location
Check Sky Visibility
To ensure Starlink works properly, you’ll need a clear view of the southern sky, spanning a 100° east-west range. Here’s what to look for:
- Open space from directly overhead to the southern horizon
- No tall trees or buildings blocking the signal
- Flat, stable ground for mounting the equipment
Verifying Location Suitability
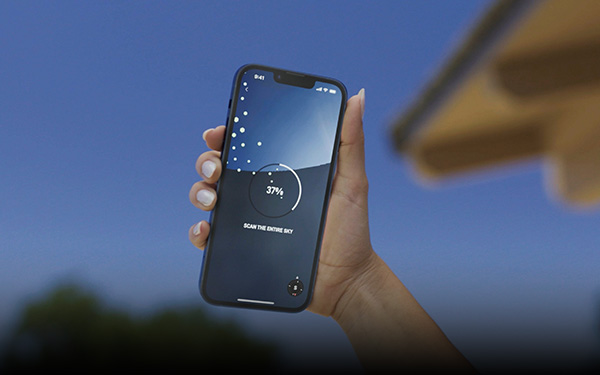
The Starlink App makes it easy to check if your camping spot is suitable. Here’s how to use it:
- Download the Starlink App
- Try the "Check for Obstructions" feature
- Point your phone’s camera at the sky to identify any potential blockages
Other apps can also help you confirm the best setup spot:
| App Name | Rating | Key Features | Platform |
|---|---|---|---|
| Satellite Finder Pro | 4.5/5 | AR view, compass tool | iOS |
| Dish Align | 4.2/5 | Satellite selection, alignment guide | iOS |
| Satfinder | 4.0/5 | Built-in compass, dish simulator | Android |
These tools can help you fine-tune your setup for optimal performance, no matter where you are.
Setup Tips for Different Locations
Your camping environment may require specific adjustments for the satellite dish. Here’s how to adapt:
- Beach Camping: Place the dish on higher ground to avoid issues with sand and salt spray. Offgrid Internet suggests keeping it at least 5 metres from the shoreline.
-
Bush Camping: Look for natural clearings away from tall trees. As Product Expert Keith.AGold advises:
Just point the satellite dish south and not towards any trees or buildings [10]
- Desert Locations: Position the equipment to avoid excessive dust. The Starlink Mini kit from Offgrid Internet includes a 15-metre power cable, giving you flexibility in finding the best spot.
For added weather protection:
- Look for natural windbreaks
- Set up on higher ground to avoid water pooling
- Use the surrounding terrain for shelter
- Always check for obstructions before finalising your setup
These tips will help you maintain a strong connection, no matter the challenges of your location.
Essential Guide to Starlink Mini for Camping and Travel
sbb-itb-ab5f32a
4. Setup and Operation Steps
Once you’ve chosen your equipment and set up your location, it’s time to move on to installation and operation. Here’s how to get started.
Setup Instructions
Follow these steps to get your Starlink kit up and running:
- Initial Equipment Check
Make sure you have everything you need:
- Starlink dish with kickstand
- Gen 3 router (router is now directly integrated into the dish on the latest model)
- 15-metre Starlink cable
- 1.5-metre AC power cable
- Power supply unit
- Physical Setup
Now, set up your equipment:
- Place the dish on its kickstand.
- Adjust the dish angle for the best alignment.
- Connect the 15-metre cable between the dish and the router.
- Power and Configuration
Finally, power up and configure the system:
- Plug the power supply into your outlet.
- Connect to the network with the password provided.
- Download the Starlink App and follow the setup instructions. You only need to use it to check for obstructions and for optimal alignment of the dish!
Setup Problems to Avoid
Avoiding common setup mistakes can save you a lot of headaches. Here are some issues and how to handle them:
| Problem | Solution | Prevention |
|---|---|---|
| Poor Signal Quality | Reposition the dish for clearer skies. | Use the app’s obstruction checker beforehand. |
| Unstable Power | Double-check all connections. | Bring backup power options if needed. |
| Weak WiFi Signal | Move the router closer to your campsite. | Place the router in a central location. |
| Connection Drops | Ensure proper dish alignment. | Let the dish complete its auto-alignment. |
Pack and Move Equipment
When it’s time to move, use the Starlink App to stow the dish, then disconnect all cables.
For Transport:
- Store everything in weatherproof cases.
- Keep the dish separate from heavy items.
- Secure all parts to avoid damage during travel.
If you’re heading out on a longer trip, you might want to invest in specialised storage. Offgrid Internet in Perth offers rental kits that include:
- Protective carrying bags
- 12/24V cigarette lighter power cables
- Cable management systems
To keep your gear in top shape, loosely coil the cables and store each component in its designated case.

5. Improve Internet Speed
Boost Signal Quality
After setting up your campsite, taking a few extra steps can help improve your internet performance.
Start by ensuring your dish is positioned as accurately as possible. Align one tripod leg away from the satellite, use a spirit level to balance the tripod, and carefully adjust the dish’s elevation, azimuth, and skew down to fractions of a degree. To find the satellite direction, you can use the SatFinder Android app, which accounts for magnetic variation in Australia [11].
Avoid placing your dish near obstructions like trees or buildings, as these can interfere with the signal. While precise alignment is key, managing your data usage is just as important for maintaining good speeds.
Data Usage Control
Once you’ve optimised your signal, keeping an eye on your data usage is crucial – especially if you’re on Offgrid Internet’s Standard Plan, which includes a 50GB monthly limit (12,5GB per week).
Here are some tools to help you monitor your connection:
- GlassWire: Tracks data in real time (rated 4.3/5 on Google Play) [14]
- SpeedSmart: Tests your connection speed (rated 4.7/5 on the App Store) [15]
Simple adjustments can help save data and improve speed:
| Activity Type | Data-Saving Tips | Impact on Speed |
|---|---|---|
| Video Streaming | Lower resolution settings | Reduces buffering |
| Web Browsing | Block unnecessary connections | Speeds up page loads |
| Background Apps | Disable auto-updates | Maintains bandwidth |
| Video Calls | Use audio-only when possible | Stabilises connection |
For heavy internet use, like streaming or downloading large files, Offgrid Internet’s Unlimited Plan is available for $20 per day (minimum 3-day hire). This plan provides unrestricted access, making it a great option for higher data needs.
Signal Optimisation Tips:
- Use your hotspot while driving to locate areas with stronger signals [13].
- Place your equipment on higher ground to improve reception.
- A Wi-Fi extender can help expand your coverage.
- Check weather forecasts, as conditions like heavy rain can affect connectivity [12].
- Consider connecting a satellite finder meter between the LNB and receiver to measure signal strength more accurately [12].
6. Weather Protection
Weather Safety Steps
Australia’s climate can be tough on satellite equipment, so taking steps to protect your gear is crucial. These precautions help maintain your equipment’s performance and connectivity, especially since standard warranties don’t cover weather-related damage.
The Dishy Shield, priced between $135 and $170 AUD depending on your dish model, offers protection against hail and extreme weather conditions [16].
Here’s how to guard your equipment against common weather risks:
| Weather Condition | Protection Method | Equipment |
|---|---|---|
| Heavy Rain | Waterproof cable guides | SpaceTek weatherproof guides |
| Lightning | Surge protection | Ethernet surge protectors |
| UV Exposure | UV-resistant covers | UV-protected polycarbonate shields |
| Hail | Impact-resistant shields | Dishy Shield or MTSAT covers |
For additional coverage, MTSAT Heavy-duty Satellite Dish Covers are available, ranging from $69.95 to $229.95 AUD [17]. These covers are compatible with various dish models, including Starlink, and are designed to handle Australia’s harsh conditions.
Once your equipment is weatherproofed, make sure to store it safely when not in use.
Safe Storage Methods
Proper storage is just as important as weatherproofing to keep your satellite gear in excellent condition. Here’s how to store your equipment securely:
- Cable Management: Use waterproof tape or ties to protect sensitive connectors and keep cables organised.
- Equipment Organisation: Store the dish, router, and power supply in separate padded compartments to avoid scratches or damage from impact.
- Vehicle Storage: If storing gear in your vehicle, secure it with locked chains to prevent theft or movement damage.
For added protection during transport, consider silicone-coated fabric covers. These covers offer UV resistance and thermal protection, shielding your equipment from Australia’s intense heat.
7. Fix Common Problems
Once your setup is complete, you might encounter some hiccups during operation. Here are practical fixes for common issues.
Signal Problems
If your satellite internet is acting up, try addressing these potential causes:
Obstructed View
- Ensure the dish has a clear, unobstructed view of the sky.
- Look out for trees, buildings, or other objects blocking the signal.
- If needed, relocate the dish to a better spot.
Incorrect Dish Alignment
- Use the Starlink app to adjust the dish’s alignment.
- Make sure the dish is level and securely mounted.
- Avoid placing it near metal objects that could interfere with the signal.
Power Fluctuations
- Check your voltage levels and consider using a voltage stabiliser if necessary.
- Keep backup power sources, like power banks, charged and ready.
Still having trouble? Move on to the next steps.
Connection Loss Solutions
If you’re losing connection, here’s what you can do:
- Quick Fixes: Restart your router and dish, double-check cable connections, and ensure your power supply is stable.
- System Checks: Run diagnostics in the Starlink app and check for firmware updates.
- Backup Options: Keep a mobile hotspot handy, download offline maps and documents, and save important contact details locally.
If these steps don’t solve the issue, you might need additional support.
Get Help
If you’re stuck, here’s where to turn for help:
Local Support Options
- Reach out to Offgrid Internet’s Perth-based support team if you’re using rental equipment.
- Explore Starlink’s online troubleshooting resources and camping forums for advice.
Emergency Solutions
- Save offline copies of support guides for quick reference.
- Keep a basic toolkit on hand for small repairs.
These steps should help you stay connected, even in challenging situations.
Wrapping Up
Staying connected while camping in remote parts of Australia is now easier with satellite internet options like Starlink Roam. A solid setup not only improves the overall camping experience but also ensures access to vital safety and emergency communication tools.
The Starlink Roam hardware is priced at A$599, with a monthly subscription fee of A$174[19]. It requires 110–150W of power to operate[20], so managing your power supply efficiently is crucial. Additionally, picking a location with a clear view of the sky is key to maintaining a strong connection. These factors highlight the importance of planning ahead.
For those who frequently explore the outback, Starlink could even replace or reduce the need for certain mobile plans, depending on your usage[19]. Its wide coverage across Australia makes it a practical choice for many adventurers.
Starlink Roam also offers the flexibility to pause your service when not in use[18]. Whether you’re working remotely, staying in touch with loved ones, or accessing important online services, a well-thought-out satellite setup can elevate your camping trips while keeping you connected.