If you live somewhere the NBN crawls, or your only option is a long copper run, a self-installed Starlink® kit can have you online the same afternoon. The hardware is genuinely plug-and-play, but the install still rewards a bit of planning. Pick the wrong spot and a single tree branch will turn your 200 Mbps link into a flickering 6 Mbps headache.
Here is a practical walkthrough: site survey, mount choice, cable run, sealing, and the network settings most people miss. Written for someone about to do their own install at home.
The install in the order that actually works
The kit comes with everything you need: dish, mount foot, factory cable, router, and power supply. The official standard kit installation guide is worth a quick skim before you start.
Run the steps in this order:
- Unbox and lay everything out on a clean blanket so you can see what is missing before you climb anything.
- Open the Starlink app and use the obstruction tool from the spot you plan to mount.
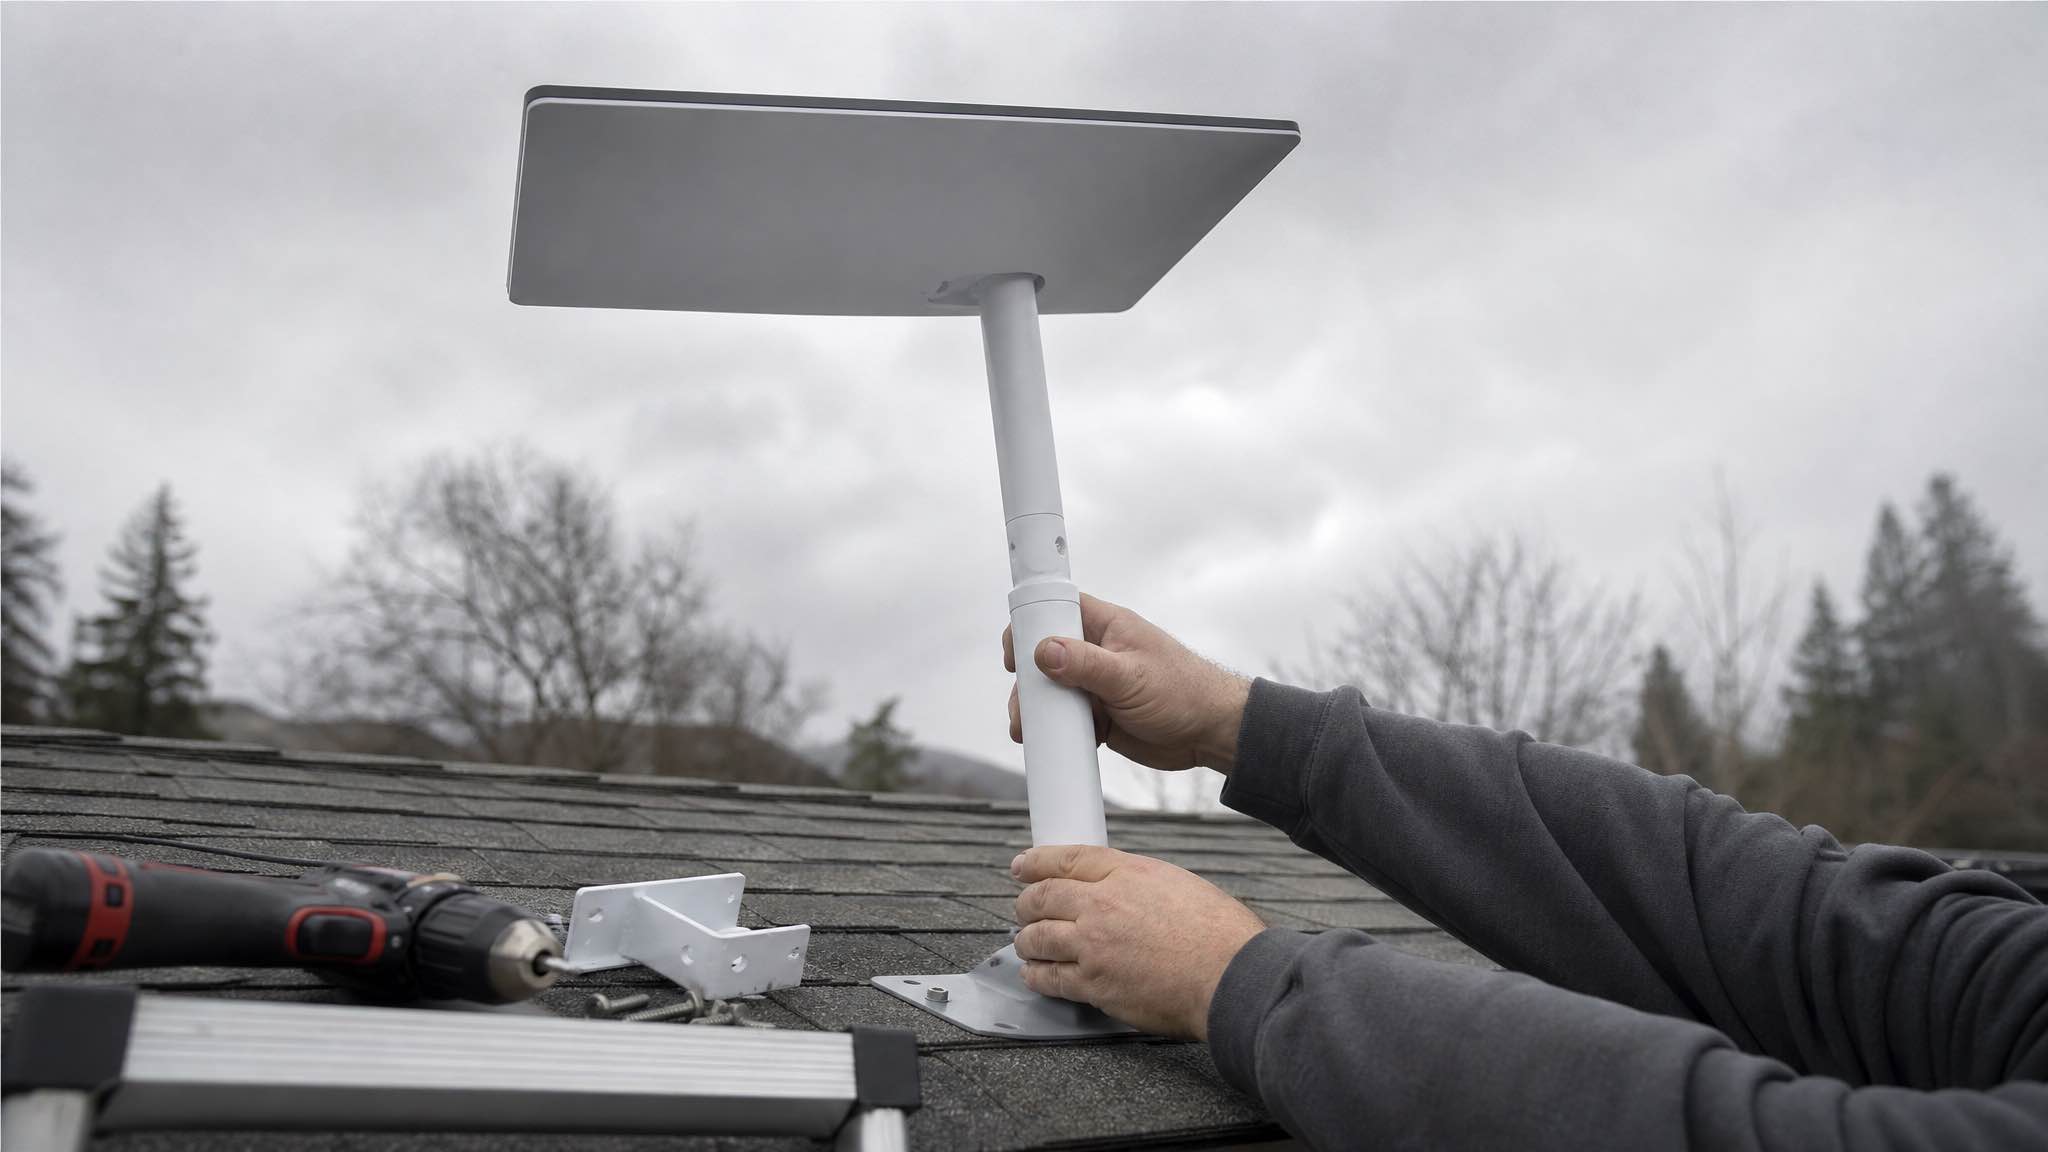
- Dry-fit the mount and route the cable run before drilling.
- Seal every penetration the same day, even if you have to come back tomorrow to finish.
- Power up last, then set the SSID and passphrase.
Almost every Starlink regret is structural: drilling twice because you skipped the obstruction scan, or sealing a roof penetration “tomorrow” and forgetting until the next storm. Budget about 90 minutes for a ground or pole install, 2 to 3 hours for a pitched roof.
What is in the box and what each part does
| Item | Purpose | Field tip |
|---|---|---|
| Starlink dish | Receives signal from the LEO satellite constellation | Needs an unbroken view of the sky arc, not just “up” |
| Mount or mast | Holds the dish in wind and weather | Lag-screw into rafters or set a steel pole in concrete |
| Factory cable | Powers the dish and carries data to the router | No sharp bends, gentle curves only |
| Router and PSU | Wi-Fi and DHCP for the home network | Place centrally and lift it off the floor |
| Sealant and grommet | Keeps water out of the building | Butyl under the foot, exterior sealant over the screws |
Site survey: pick the mount before you pick the location
The biggest performance lever on any Starlink install is sky view. The dish tracks LEO satellites across a wide cone of sky, so a tree branch a TV dish would ignore can clip the link every 30 seconds.
Walk around the property with the Starlink app open. Hold the phone at the height of your planned mast and run the obstruction scan. If the ring shows red slices, move. A higher point on the same wall is often enough. Branch tips grow another 50 to 100 mm a season, so leave margin.
Three mount families cover most homes:
- Ground or pole mount. Steel post set 600 mm into concrete, dish on top. Easiest to service, safest to work on, and forgiving in wind. Trades off a longer cable run.
- Wall or eave bracket. Short cable, tidy look. Watch the soffit timber, some older Aussie eaves are surprisingly thin.
- Roof mount. Best sky view, hardest to do well. You are committing to lag screws into rafters, butyl under the foot, and proper flashing or sealant over every fastener.
Non-penetrating ballasted bases work on flat roofs, but think about wind load before you trust a few concrete blocks.
| Mount type | Skill level | Pros | Trade-offs |
|---|---|---|---|
| Ground pole in concrete | Medium | Safe access, solid in wind | Longer cable run |
| Wall or eave bracket | Medium | Short cable, tidy install | Limited height, watch soffit strength |
| Tripod roof mount | Advanced | Best sky view | Roof work, sealing is critical |
| Non-penetrating roof base | Medium | No holes in the roof | Heavy ballast, plan for wind |
| Temporary stand | Easy | Quick testing | Not safe in weather |
If you live somewhere windy, a ground pole is calmer than a tall roof mast. Wind leverage on a 2 metre mast adds up fast. Heavy rain attenuates any satellite link, but good placement softens the hit, see the field write-up on how weather affects Starlink speeds for typical numbers.
Running the cable without killing your speed
The factory cable is one continuous run from dish to router. Treat it accordingly:
- No sharp bends. A kinked cable can shave 20 to 30 percent off your speed.
- Aim for a gentle service loop near the dish so wind movement does not strain the connector.
- When you bring it through the wall, drill a 10 mm hole, fit a grommet, and run a drip loop so water falls away from the entry point.
- Seal the penetration with exterior-grade sealant the same day. Open holes invite ants, water, and regret.
For a long run to an outbuilding, use Starlink’s own extension. Third-party joins on factory cable rarely end well.
Once the cable is inside, click it into the router, plug in the PSU, and walk away for a few minutes. The dish will tilt, find a satellite, and start downloading firmware before you have finished the SSID setup.
Network setup: router placement and bypass mode
The dish is the easy part. The next bottleneck is almost always Wi-Fi placement and double NAT.
The default Starlink router is fine for small homes or apartments. Put it central, off the floor, and away from metal panels or mirrors. Set a short SSID and a strong WPA2 or WPA3 passphrase in the app, and leave auto-updates on.
For anything bigger than a 3-bedroom house, or any home with serious smart-home or gaming gear, switch the Starlink unit to bypass mode and run your own mesh. Bypass hands the public IP straight to your router and removes the double NAT, which makes everything from PlayStation parties to Home Assistant happier.
| Network setup | When it makes sense |
|---|---|
| Starlink router only | Small homes, apartments, simple needs |
| Starlink router plus Starlink mesh nodes | Medium homes, one app, matched radios |
| Bypass mode plus a third-party mesh (Eero, Orbi, TP-Link, Ubiquiti) | Larger homes, gamers, smart-home heavy setups |
| Ethernet from the router to a PC or switch | Lowest latency for work calls, NAS, gaming |
If you hit common setup snags on day one, like devices stuck on 2.4 GHz or the app refusing to save the SSID, the 5 most common Starlink setup issues and fixes covers the usual suspects.
Why is my Starlink slow or dropping? The real fixes
Almost every speed complaint traces back to one of three things: obstructions, weather, or cabling. Work through them in that order before you touch router settings.
Run the obstruction scan again, this time at actual dish height. A branch that was clear at 2 metres might clip the path at 4. Then check the weather radar, since a passing storm cell drops everyone’s link for a few minutes. If the sky is clear and the radar is empty, look at the cable: inspect both ends for moisture or dirt, reseat the connector until you hear a click, and walk the run for new kinks where furniture or a pet may have shifted it.
| Symptom | Likely cause | Fix |
|---|---|---|
| Speed swings from fast to very slow | A tree tip or chimney clipping the path intermittently | Trim, or move the mast 1 to 2 metres |
| Drops during heavy rain | Weather attenuation | Wait the cell out, keep the dish clear |
| Wi-Fi fine near router, bad upstairs | Router in a corner or behind metal | Reposition, or add a mesh node |
| Random app errors during setup | Double NAT or stale firmware | Enable bypass mode, let firmware update |
| Stutters only on video calls | Packet loss from a cable bend or moisture | Inspect and reseat the cable |
To rule Wi-Fi out, plug a laptop into the router with Ethernet and run a speed test. If wired is fine but wireless is rough, you have a Wi-Fi placement or capacity problem, not a Starlink one. The snapshot of Starlink speeds in Perth and Western Australia gives a sense of typical regional performance, and the Starlink V3 notes cover the newer hardware now rolling out.
How Starlink compares to the other satellite options
People often ask whether they should still consider HughesNet, Viasat, OneWeb, Amazon Kuiper, or Iridium. The short answer: it is mostly about latency and use case.
Starlink runs in low-Earth orbit, so latency is typically 25 to 60 ms. Geostationary services like HughesNet and Viasat sit around 500 to 700 ms because the satellites are 35,000 km up. For video calls, cloud apps, and gaming, that gap is the whole ball game.
OneWeb is also LEO but mostly sold through enterprise and community channels. Amazon’s Kuiper constellation is still ramping, which is useful pressure on pricing. Iridium serves satellite phones and low-bandwidth IoT, not home internet. DirecTV and Dish Network are TV services, not internet, despite the roof dish looking similar.
| Provider | Typical latency | Throughput | Best for |
|---|---|---|---|
| Starlink | ~25 to 60 ms | Often 50 to 250 Mbps | Calls, streaming, gaming, real-time use |
| HughesNet | ~500 to 700 ms | Lower speeds, capped plans | Email, browsing, non-real-time use |
| Viasat | ~500 to 700 ms | Low to moderate | Basic streaming and browsing |
| OneWeb | ~70 to 100 ms | Enterprise-grade | Business, community, backhaul |
| Amazon Kuiper | Developing | Developing | Future consumer and enterprise |
| Iridium | High for data | Very low | Sat phones, IoT, tracking |
If you want the broader market context, Amazon’s push against Starlink in Europe and the recent SpaceX launches adding capacity are both worth a quick read.
Pre-pack checklist before you leave the job
This is the list I run before packing tools at a client’s place. It keeps leaks away and makes any future service trivial.
- Butyl under every mount foot, lag screws into structure, exterior sealant over the heads.
- Drip loop at the cable entry so water falls away from the hole.
- Cable labelled at both ends for easy swaps later.
- Mast bonded to the home’s earthing system if local code requires it for a metal pole.
- Photos of the finished mount and cable run for the homeowner’s records.
| Check | Why it matters | What to look for |
|---|---|---|
| Fastener depth | Stops mast wobble and loosening | Lag screws into solid wood, not just sheathing |
| Cable strain relief | Prevents connector damage | No tugging, gentle service loop near dish |
| Water path | Protects the building envelope | Drip loop, sealed entry, no uphill cable runs |
| Router placement | Improves Wi-Fi coverage | Central, shelf height, away from metal |
| App health | Confirms a clean sky view | No red slices in the obstruction chart |
If fibre arrives at your address later, keep the mast and cable path neat. Most providers will happily reuse a clean penetration, and if you ever come back to Starlink, you will be online in minutes.
FAQ
Do I need a professional to install Starlink?
Most homeowners can handle a ground or wall mount with basic tools. Roof work adds real risk and proper waterproofing matters. If ladders or sealing make you nervous, hire a local antenna installer for a half-day.
What affects Starlink speed the most?
Obstructions first, weather second, home Wi-Fi third. Use the app’s obstruction tool, keep the dish high and clear, and put the router in the middle of the house.
Can I use my own router and mesh?
Yes. Enable bypass mode in the Starlink app so your router gets the public IP, then run Wi-Fi and DHCP from your own gear.
How long does it take to get online?
With a clear mount and a short cable run, 60 to 90 minutes from box to browsing is typical. Roof installs run 2 to 3 hours.
Is Starlink better than HughesNet or Viasat for video calls?
For interactive use, yes. LEO latency makes calls and gaming feel like a normal connection, where geostationary services always feel half a second behind.